Today I am switching from using shared hosting, over to VPS hosting. I figure one of the lowest tiers of either Digital Ocean or Vultr should be suitable for my low traffic sites. The process took two days of fiddling but I finally got it up and running properly. The finally process is described below:
Setup your VPS
I went with vultr.com as it gave me double the RAM for the same price as Digital Ocean. I have also heard great things about Vultr so lets go with them. There was as promo during the time I signed up where they would match my first payment. I added $50 to my account and so now I have $100 credit to use.
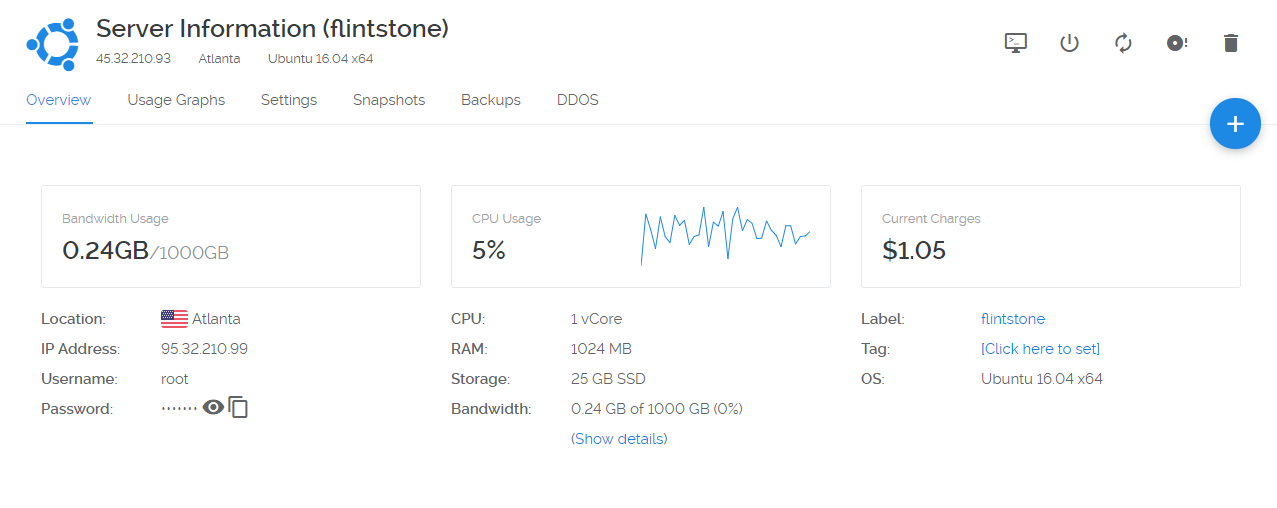
Once I had an account with credits, I fired up a $5 server and picked a location to my liking (Atlanta). $5 a month for 25GB storage and 1,024MB RAM is plenty for low traffic sites.
ServerPilot
Now I am not very experienced maintaining a linux server. My previous shared hosting was all managed so I didn’t have to concern myself with setting up firewalls, installing PHP version, Mysql, running patches etc. This is all your responsibility now on a VPS. To make it easier on myself I setup an account on ServerPilot. They setup your vps with a basic stack suitable for wordpress and keep your machine patched and secure.
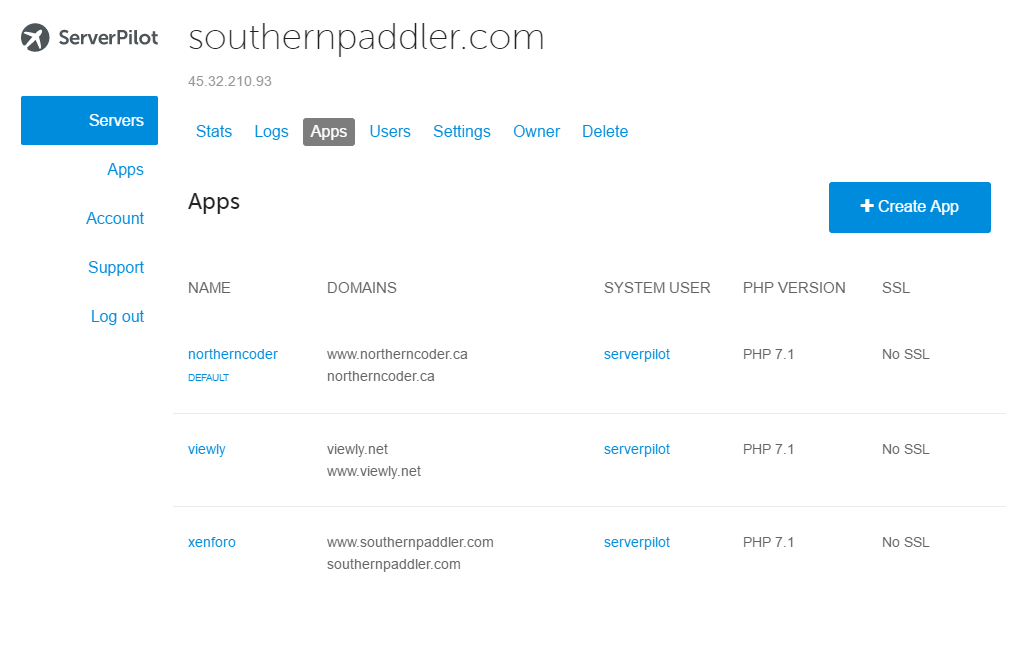
So there is my ServerPilot admin page. Each “site” is a new “app”. To add a new website to my VPS I simply click on the “Create App” button and fill out 2 or 3 required details. It will even pre-install wordpress for you if you need.
With a few clicks your ready to go. The only drawback to the free ServerPilot tier that I was using was that SSL is not an available option. I would need to upgrade to the $10/month tier for that. Luckily you still have complete control of your VPS so you can install the SSL Certificate yourself. Now its time to redirect your domain to your new host!
Configure your DNS to point to your new VPS
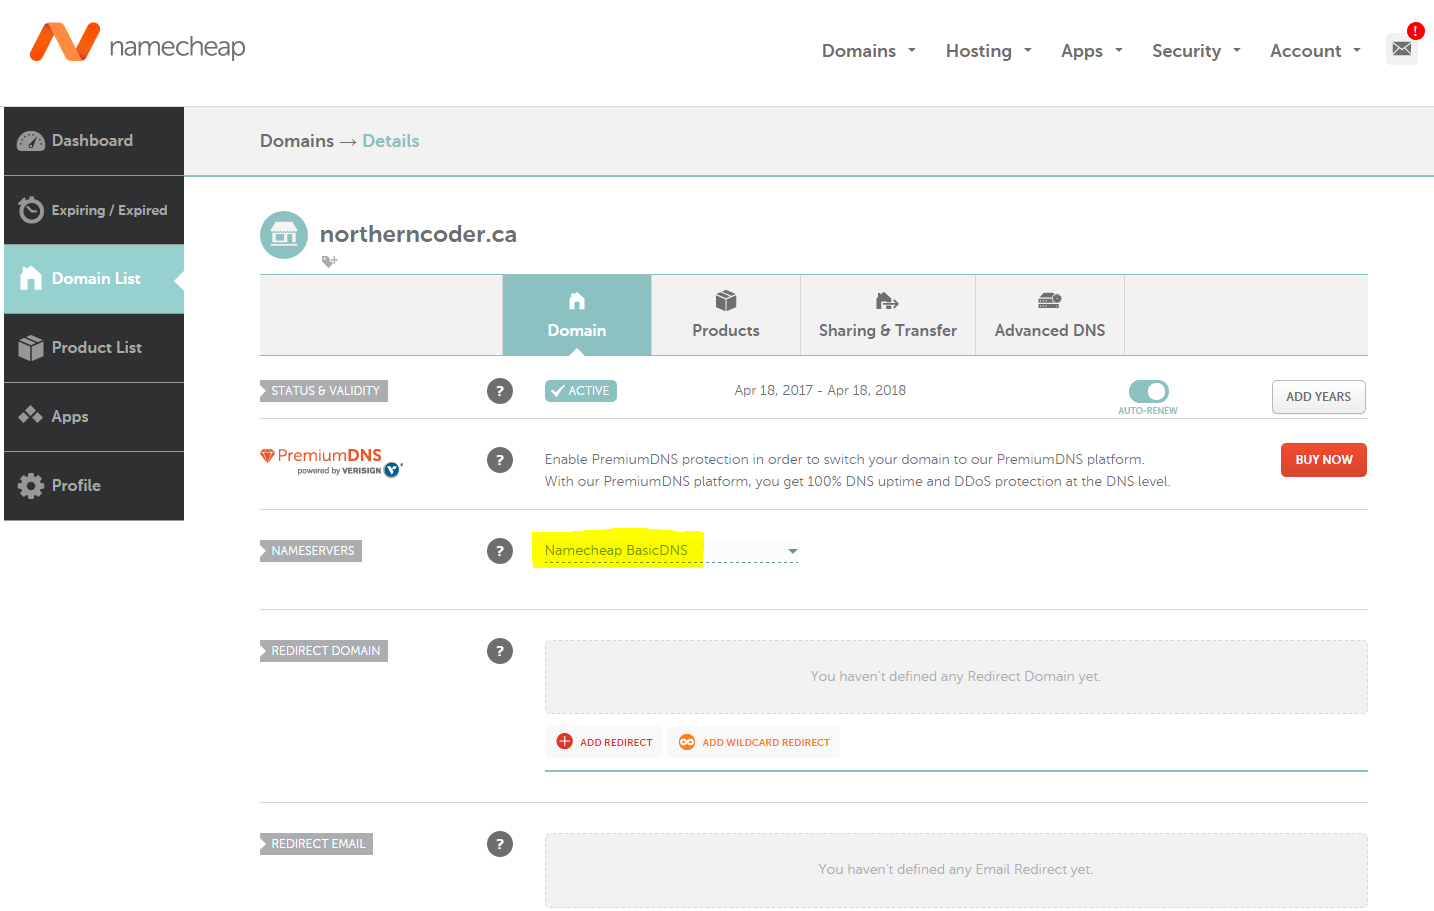
I use Namecheap for my domains so I had to go over there and change the name-servers from using Crocweb.com (my old shared hosting dns) over to Namecheap’s DNS and then manually add the C-Name entries.
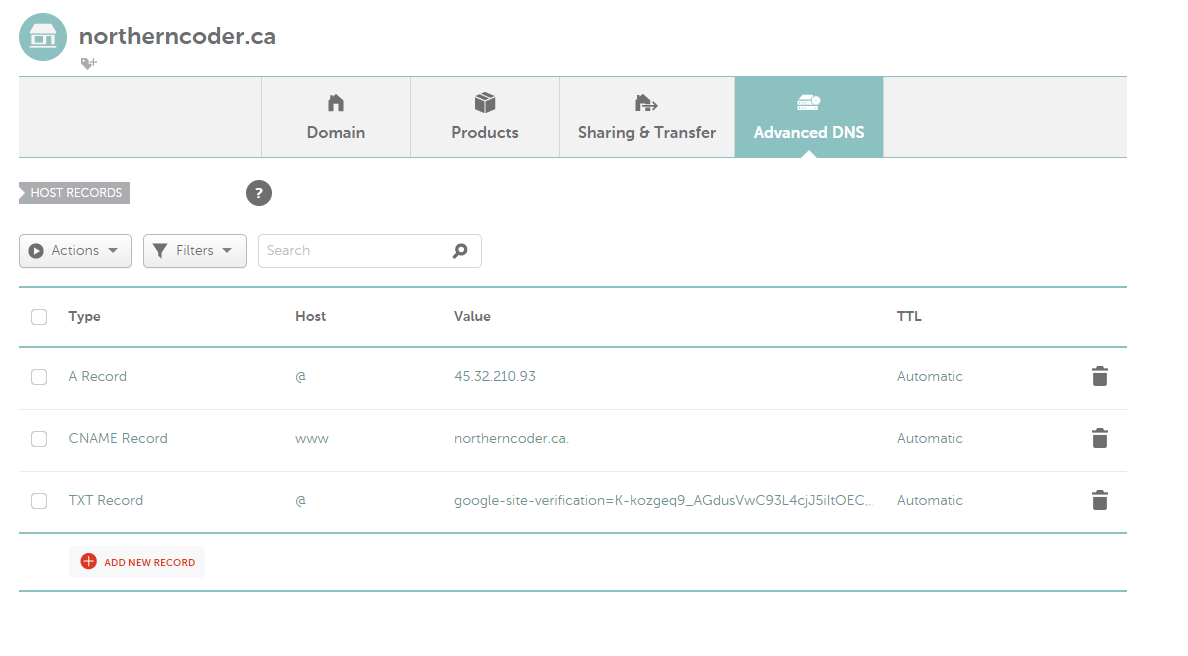
Add a CNAME Record. Set the host to “www” and the value to your domain name. I set the TTL to automatic. Then add an A record and set the host to @ and the value to the IP address of your vps server.
Generate an SSL key from LetsEncrypt using Certbot
This is where it got a little tricky. After finding a few articles on the subject, the one I decided to follow was this one: Installing a free lets encrypt ssl certificate on server pilot
I had a few failed attempts at this so you may want to take a “snapshot” of your VPS before you attempt this. The worst case scenario is you just roll back your machine.
So the first step was to: cd ~/srv/users/serverpilot/
Stop nginx from runningsudo service nginx-sp stop
Now here is where I had permissions issues. The article I followed suggested I run “./certbot-auto certonly”. I could not get that working, no matter if I was root or a new linux user setup with full permissions. What I did instead was install Certbot via the instructions on its site:
$ sudo add-apt-repository ppa:certbot/certbot

$ sudo apt-get update

$ sudo apt-get install certbot
After it is finished installing, I simply ran : certbot certonly
Update. I learned later that I could fix the permission by running the command below. So instead of certbot certonly, I could run the command below :chmod a+x certbot-auto
./certbot-auto
Configure Nginx to use SSL
We now need to modify nginx config files to know about SSL.cd /etc/nginx-sp/vhosts.d/
In here you should see your “yourdomain.conf” file that was auto generated by ServerPilot.
nano mysite.conf
Now add the following to that file:
server {
listen 443 ssl;
listen [::]:443 ssl;
server_name
www.mysite.com
mysite.com
;

ssl on;

ssl_certificate /etc/letsencrypt/live/mysite.com/fullchain.pem;
ssl_certificate_key /etc/letsencrypt/live/mysite.com/privkey.pem;

root   /srv/users/serverpilot/apps/mysite/public;

access_log  /srv/users/serverpilot/log/mysite/mysite_nginx.access.log  main;
error_log  /srv/users/serverpilot/log/mysite/mysite_nginx.error.log;

proxy_set_header    Host              $host;
proxy_set_header    X-Real-IP         $remote_addr;
proxy_set_header    X-Forwarded-For   $proxy_add_x_forwarded_for;
proxy_set_header    X-Forwarded-SSL on;
proxy_set_header    X-Forwarded-Proto $scheme;

include /etc/nginx-sp/vhosts.d/mysite.d/*.nonssl_conf;
include /etc/nginx-sp/vhosts.d/mysite.d/*.conf;
}
Save with Ctrl + o and exit with ctrl + x
Restart Nginx:sudo service nginx-sp restart
Redirect non-secure requests to use https
We need to add url rewriting to send all non-secure traffic to https. This means modifying the .htaccess file in the root of our wordpress/website folder.
<IfModule mod_rewrite.c>
RewriteEngine On
RewriteBase /

RewriteCond %{HTTPS} !=on
RewriteRule ^ https://%{HTTP_HOST}%{REQUEST_URI} [L,R=301]
</IfModule>
Update
I haven’t tried to automate it yet but here is the quickest manual way to renew the certificate:
cd srv/users/serverpilot/
sudo service nginx-sp stop
certbot renew
sudo service nginx-sp start
Thats it! Good for another 3 months.
*note if your using serverpilot you could try the following command
./certbot-auto renew --pre-hook "service nginx-sp stop" --post-hook "service nginx-sp start"
or
./certbot renew --pre-hook "service nginx-sp stop" --post-hook "service nginx-sp start"


