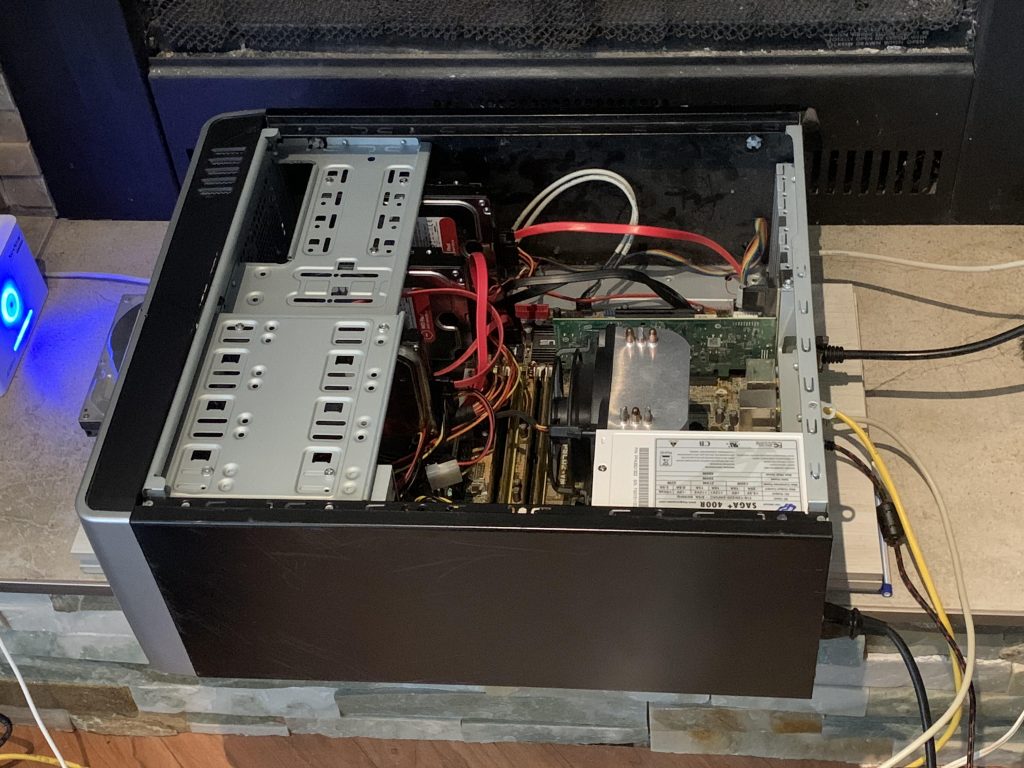
If you have an old PC laying around, you could setup a simple and affordable NAS (Network Attached Storage) to hold your precious data with functionality equivalent to expensive standalone NAS devices. You will need 2 similar sized hard disks to store the data in a mirror, and old PC and some time to follow the steps below.

Hardware Required
- Old PC (Celeron D 2.8, PSU, 4GB ram, gigabit ethernet)
- 16 GB usb stick (used for installing Ubuntu, only 4gb is needed)
- 2x 3GB Western Digital Red Drives (setup in Raid 1 mirror with Btrfs)
- 500gb boot drive (ext4)
- optional (USB dock for cold storage backup to 2gb WD Green drive)
Here are the steps I took to get a simple Ubuntu Server setup, a 2 drive raid 1 mirror (using Btrfs for checksum data integrity), samba share to all devices in the house, CUPS printer sharing an old Brother Laserjet.
I am duplicating this setup on a Raspberry Pi 4b during my holiday break and plan to get rid of this old noisy Celeron PC. You can read about my Raspberry Pi NAS build here.
1) Create a Ubuntu Live Boot USB stick
Download latest Ubuntu Server image iso (Click on option 3 button)
Download Rufus app for Windows to burn that iso to your USB Stick.
When the ubuntu boot disk is created, pop that into your old PC and boot it up.
Imporant to note – Press F2 to go into your BIOS and configure some settings. What I did was disable the unnecessary IDE controller, prioritize the USB stick as the first in the boot sequence, and set CPU fan speed profile to silent. I also made sure the bios saw the 2x WD Red drives, the 500gb boot drive, the USB stick, and the 4 GB of ram. You can also disable the boot logo so you can see any errors that may occur.
2) Install Ubuntu Server
There are quite a few steps to the installation but most are self explanatory. When it gets to the Storage section, I created an EXT4 partition on the 500gb drive that would be the boot drive. Default is to create an LVM but you don’t need that if you don’t plan to resize your boot partition later. You can also create a Btrfs partition on your media drives but they can also be done later.
Once the install is finished you should be sitting at a login prompt. If you prefer to do the rest of the configuration on your main PC you can connect to your server via a SSH.
Find your servers ip address:
ip addr show
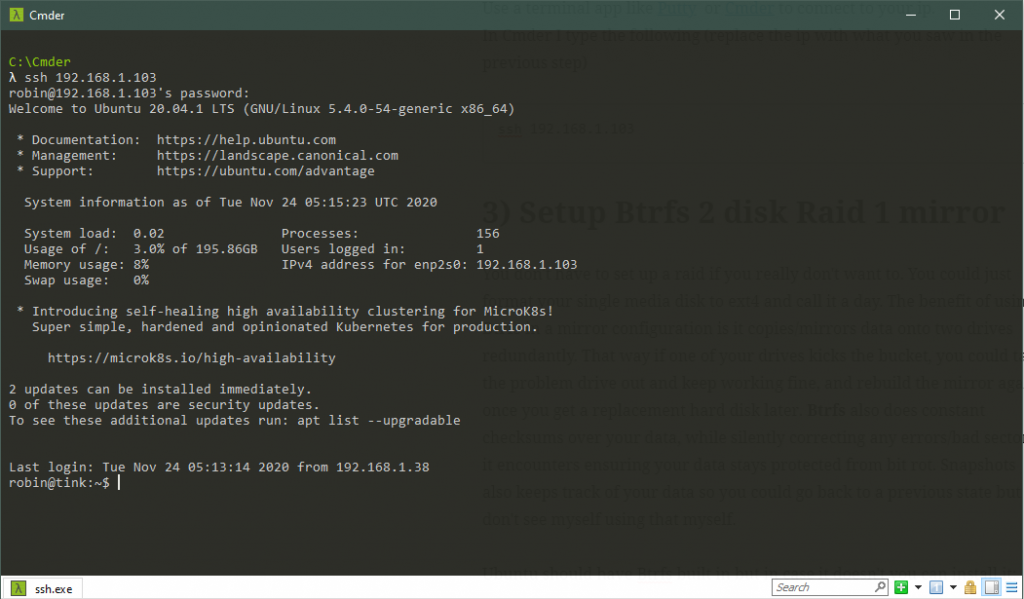
Use a terminal app like Putty or Cmder to connect to your ip.
In Cmder I type the following (replace the ip with what you saw in the previous step)
ssh 192.168.1.103

3) Setup Btrfs 2 disk Raid 1 mirror
You don’t have to set up a raid if you really don’t want to. You could just format a single disk to ext4 and call it a day. The benefit of using Btrfs in a mirror configuration is it copies/mirrors data onto two drives redundantly. That way if one of your drives kicks the bucket, you could take the problem drive out and keep working uninterupted, and rebuild the mirror again once you get a replacement hard disk later. Btrfs also does constant checksums over your data, while silently correcting any errors/bad sectors it encounters ensuring your data stays protected from bit rot. Btrfs also supports snapshots so you could go back to a previous state but I don’t see myself using that myself.
Ubuntu should have Btrfs built in but in case it doesn’t you can install it:
sudo apt-get install btrfs-tools
List all the disks, partitions and filesystems found:
sudo lsblk -o NAME,FSTYPE,SIZE,MOUNTPOINT,LABEL

If you look at the file sizes you should be able to identify which drives are the large media drives we will setup for the raid. For me it was sda and sdc and in the above image you can see I already have a btrfs partitions for them which I created during the Ubuntu install. If you didn’t create the partitions in the Ubuntu installation we can do it now:
Create the btrfs partitions (if you didn’t already during the Ubuntu install)
fdisk /dev/sda
- at the prompt:
- press
'o'to create an empty new partition - press
'n'to add a new partition - press
'p'for primary and then<enter>for default values for sector sizes etc. - press
'w'to write to disk and exit fdisk - repeat this for the second disk (in my case
/dev/sdc)
Create the file system on the new partition and label it Nas:
mkfs.btrfs -L "Nas" /dev/sda -f
mkfs.btrfs /dev/sdc
Here we create the btrfs file system on the first disk (sda) and -f to force it in case there was already an existing partition on it to overwrite. I didn’t add a label to the second disk.
Mount your partition, create a subvolume, then mount the subvolume
mkdir /mnt/nas
mount /dev/sda /mnt/nas
cd /mnt/nas
btrfs subvolume create mediapool
cd
umount /dev/sda
mount -o compress=zlib,subvol=mediapool,autodefrag,noatime /dev/sda /mnt/nas
- Make a new directory called
/mnt/nas - This mounts the disk so it is available when you navigate to
/mnt/nas - Go into that directory /mnt/nas
- Creates a subvolume called ‘mediapool’. Name it anything you like.
- Go out of that folder so we can unmount the disk
- Now finally we remount directly to the subvolume we created instead of the disk this time.
- The options I have enabled are zlib compression (suitable for hds, use lzo for SSDs) noatime prevents storing last access time data to increase performance, autodefrag lets btrfs defrag when it needs to in the background
Add the second disk to the pool
btrfs device add -f /dev/sdc /mnt/nas
Convert the pool to Raid1 and balance the files over the 2 disks
btrfs filesystem balance start -dconvert=raid1 -mconvert=raid1 /mnt/nas
and that is it, we can verify by checking :
btrfs filesystem show /mnt/nas
While you should be able to access your drives now with everything working, you will find that after a reboot the mounted folders have gone. We need to modify /etc/fstab to automatically mount on reboot
Modify /etc/fstab to automatically mount the drives on boot
blkid /dev/sda
btrfs subvolume list /mnt/nas
nano /etc/fstab
The first line lets us find the UUID of the drive (c2afdb43….)
Second line we can find the subvolume ID (mine was 257)
/etc/sda.
Make a note of it as we will be adding the two in the fstab config file:
UUID=c2afdb43-2cc6-4837-88ea-150fa96997ab /mnt/nas btrfs compress=zlib,subvolid=257,subvol=mediapool,autodefrag,noatime 0 0
ctrl + o to save, Ctrl + x to exit the editor.
So thats it. We have created a secure storage space to save your important data. The next step is to share this on your home network to other devices (other windows pcs etc). To do that we will set up a samba share:
4) Setup Samba to share files with Windows systems
Install the samba drivers
apt install samba-common samba smbclient
Configure Ubuntu firewall to allow Samba through
ufw allow samba
Configure /etc/samba/smb.conf
There are a few settings to setup for simple folder that we want to share and those settings need to be in smb.conf. First make a copy before of the config file before we start changing it, then use Nano to open the text editor.
cp /etc/samba/smb.conf /etc/samba/smb.conf.bak   //create a backup
sudo nano /etc/samba/smb.conf
- Use the arrow keys to move around,
Ctrl + o(then press enter to save the file),Ctrl + x(to quit the editor)
I will provide my smb.conf file to download if you think you find it easier to start with that.
The key items you need in the config are:
workgroup = WORKGROUP
[global]
    netbios name = yourservername
[nas]
    path = /mnt/nas
    available = yes
    valid users = yoursambausername
    read only = no
    browseable = yes
    public = yes
    writable = yes
remove unnecessary shares
#[homes]
#    comment = Home Directories
#    valid users = %S, %D%w%S
#    browseable = No
#    read only = No
#    inherit acls = Yes
Create a samba user
smbpasswd -a yoursambausername
New SMB password:
Retype new SMB password:
Added user yoursambausername
Test the config
Typing the command testparm will show your configuration settings. If you notice something missing here that you are sure you added in the configuration file, there is probably a typo somewhere to fix.
Start Samba and NetBios Name Services
systemctl enable smbd
systemctl start smbd
systemctl enable nmbd
systemctl start nmbd
Assign user rights to the shared NAS folder
This is the final step of the puzzle. If you dont assign rights you might be pulling your hair out like I was, being able to see the nas folder but unable to save/write any changes to it.
chown -R yoursambauser:yoursambauser /mnt/nas
Thats it! Congratulations, go over to your Windows PC and navigate to your ip in file explorer \\192.168.1.103 and you should see your shared folder waiting for you!
Optional, you can add a usb printer to the server and share that for every device in your home (win/mac/iphone/ipads). Setup a CUPS Print Server on Ubuntu
Resources:
Btrfs commands : BTRFS Fun – Funtoo
Fdisk commands : 10 fdisk Commands to Manage Linux Disk Partitions (tecmint.com)
Btrfs manual mounting : Manpage/btrfs(5) – btrfs Wiki (kernel.org)
Raid types visualized : RAID 0, RAID 1, RAID 5, RAID 10 Explained with Diagrams (thegeekstuff.com)